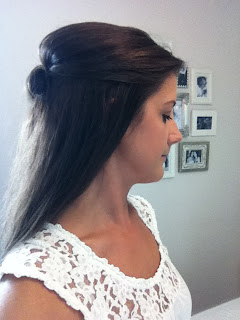
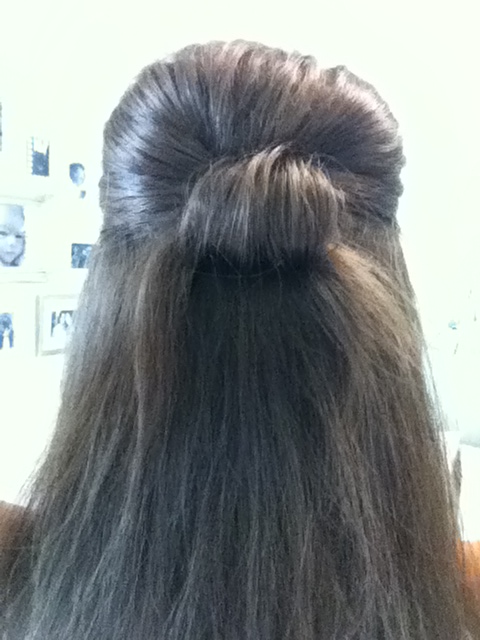
Today I thought I'd run through how I achieve this half up, beehive hairstyle, with the loop detail at the back. It's a really cute look and is really simple to do. It usually takes me about 5 minutes.
All you need is a comb, some hairspray, some hair slides and a hand mirror.
Step one: Back-comb the hair
This is the first and vital step to getting the volume for the beehive and especially important for me, as I have quite fine hair. So I take the top area of my hair and separate into sections and back-comb the roots as much or as little as you'd like, depending on the type of hair you have and the amount of volume you want in your beehive. Then, spray the roots with hairspray and comb gently over the top, to smooth out any fuzzy, visible edges! Add a little spray to the top of your hair, to hold in place.
Step two: Divide hair & start to create beehive shape
Take hair from both sides of your head, at the same time and pull towards the back of your head, whilst taking the hair from the sides and back with your fingers, at the same time. Like you would if you were putting your hair into a 'half up, half down' do. Pull it back to a slightly lower point than you want the loop to sit.
Step three: Create beehive
Now you are holding the hair at the back of your head, push it upwards to a place where you are a) happy with the amount of beehive (you can go crazy here, or just have a gentle beehive like I have) and b) are happy with the level at which you will pin the hair and create the loop detail.
Step four: Pin the hair
Using your hair slides, pin each side of the hair, at one point on the back of the head. Make sure the hair is secure and you are happy with the appearance of the beehive. Spray.
Step five: Create the loop detail
Now you can start to create the loop. Start by taking the section of hair that has been pinned back, making sure to remove any straggling hairs from the rest of you head that have caught up in the hairspray. Loop the hair in your fingers and divide the hair into two sections, taking one to one side and the other to the other side, whilst pulling it up over the pins already in place (so that the loop covers this). This is where you need eyes in the back of you head, as you need to feel the loop and adjust the size as needed. If you can hold the loop and sides in one hand, you might be able to manage to have a sneaky look in the mirror, which will help this stage.
Step six: Pin the loop detail
Once you are happy with how the loop looks, take a couple of hair slides and pin it through the loop, from outside, towards the centre. Do this on both sides. Spray.
And you're done! Pretty easy! It gets easier with practice too and you can get more and more adventurous with the size as well!
What do you think? Is this something you'll try?
Check out my bun and side plait step by step too!


Love this, just a little something extra instead of just scraping it up! X
ReplyDeleteIt is isn't it. It's dead easy too. :) x
Delete