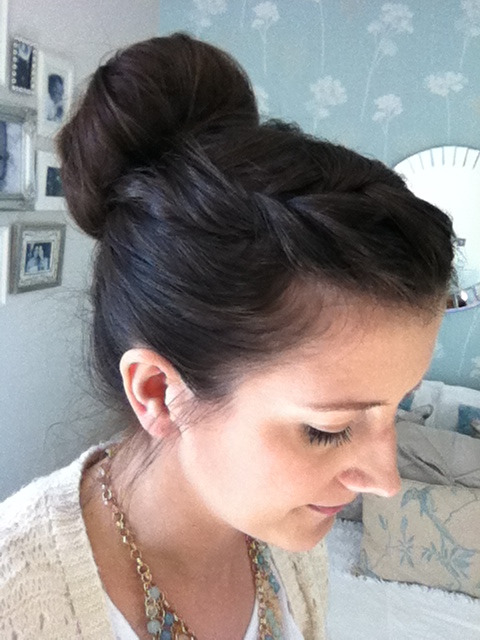
I was asked a few times today about how I do my hair in this bun. So, I thought I'd post a quick 'step by step' on how its achieved. It's dead easy. I especially love this look on a day when I don't have enough time to wash and blow dry my hair. Lets face it, not many of us have time to do that everyday! It can work with straight or curly hair, thick or thin. The one restriction is length really. It needs to be past the shoulders really in order to have enough hair to tuck into the messy bun. (If you noticed my cute collar necklace in this photo, check out my previous post for more info and photos).
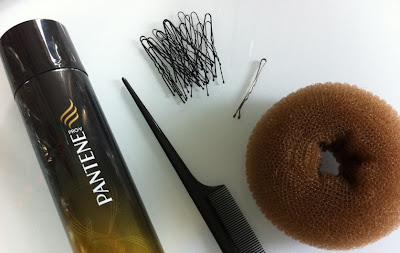
All you need is a comb, a hair doughnut, some hairspray, a hair slide, a hair band and lots of securing pins. It usually takes me about 5 minutes.
Step one: Prep the hair
Firstly back comb the roots a little and give your hair a slight hairspray, whilst hanging your head upside down. I find that this helps to give the hair a little extra volume because my hair is quite fine. It also makes my hair less slippery and holds the style for longer. If you don't want to back comb your roots, a little spray onto the roots and then blow drying the roots until the spray has dried, has a very similar result. Obviously if you are blessed with thicker hair anyway, you can skip this stage!
Step two: Plait the fringe
Part the front of you hair on the side and take the fringe section across to one side or the other, which ever you're most comfortable with. Then, French plait the fringe, taking in a couple strands from each side each time and working the plait toward the back of you head. Pin in place with a hair slide. It doesn't matter what size or colour, as this will be removed once the bun is secure.
Step three: Tie the ponytail
You then need to put your hair into a high ponytail, being sure to take the end of the plait securely into the ponytail and making sure all other hair is firmly back and not caught underneath the hair slide. If there is hair tangled underneath and the hair won't sit flat, I sometimes take the slide out and hold the plait into my ponytail, whilst I add the band. I can do this as my fringe is quite long but it would be easier to remove the slide, re position the hair underneath and secure in place again, if you fringe is shorter.
Step four: Add hair doughnut
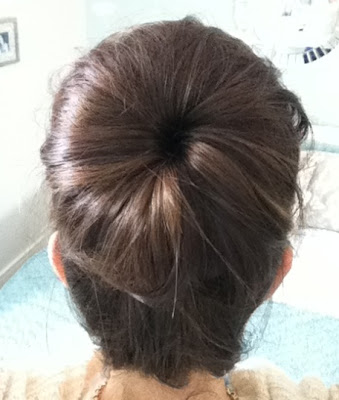
Once your ponytail is in place, you can add the hair doughnut over the top of the ponytail, pulling the ponytail through the middle. You can get various different size and colour doughnuts. Find the best one for the look you want and for your hair colour. The closest it is to you hair colour the better, just in case a bit peeks through your hair!
Step five: Create the bun
I find it's good to give the ponytail a slight spray first and then lay it over the doughnut, spreading the hair to cover it all. Once you have covered the bun, start pushing the hair around and under the doughnut. Continue doing this until all the hair is hidden. You don't need to make this tidy. I think the messier the better sometimes!
Step six: Secure the bun
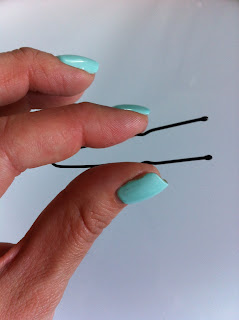
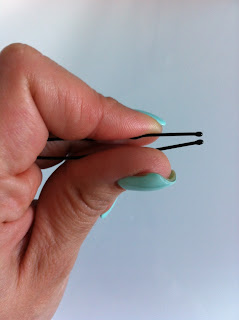
Once you are happy with the look of your bun, you can start adding the securing pins around the bottom edges, closest to your head, to hold it in place. It's best to get the pins that you can push together before pushing into the bun, as when they are in place, they open to add extra grip. I use BaByliss 'No Ouch Pins'. They come in two thickness's and you get 50 in a pack. I think I got them in Boots. I usually find about 5/6 pins is enough, but use as many as you need. Once all the pins are in place, you can remove the hair slide holding your plait.
Step seven: Spray to hold
Once you are happy with you bun, give it a little spray to hold in place. And that's it! Once you've got the hang of it, there's so many variations you can try.
Top tip: I always take a few extra securing pins out with me, in case a couple strands of hair escape during the day/night. It's always good to be prepared!


No comments:
Post a Comment
Thanks for your comment and your interest in my blog! :)